I won't be sharing the text with this book, but the drawing instructions couldn't be easier. I mostly followed the order of the book except one thing that has always bothered me about this book is that the eyes come before the face which makes absolutely no sense, right? RIGHT?
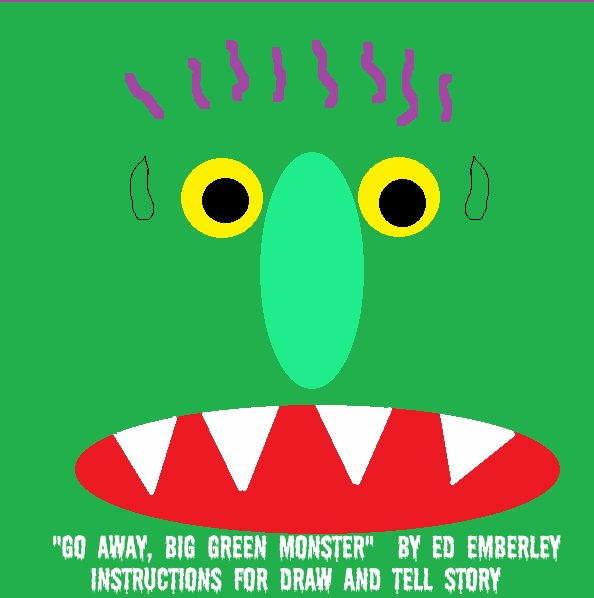
1) Face. I've used a green background for my face. I drew this on the computer instead of lugging out a white board from storage, but you could get away with just drawing a circle with a green marker. Don't color it in, just draw the outline.
2) Eyes. With a yellow marker, draw two circles. Fill them in. You can put a another black circle in the middle for the pupil, as I have. Or not. I do think it adds something of a realistic effect.
3) Nose. Draw a long oval shape vertically with a green marker. Fill it in.
4) Mouth. Draw a long oval horizontally with a red marker. Fill it in. Erase a few triangles for teeth.
5) Ears. Draw 2 squiggles on the far sides of the eyes with a black marker.
6) Hair. Draw some squiggles with a purple marker for hair.
Then, as it's time to GO AWAY for the big green monster and you can take an eraser to your
Erase in the opposite order:
1) Hair.
2) Ears.
3) Mouth
4) Nose
5) Eyes
6) Face
Voila!
With a story like this one that many children already know and love, I like to repeat at each storytime during a 6-week session. It's a fast one, but there are lots of ways to tell it. It adds an element of continuity to a session to repeat stories, but it also shows parents & caregivers that storytime is about bringing the stories to life. So, for example, you could structure your sesion like this:
This is so great! I've always wanted to do a draw and tell story but I've been terrified to try. This seems easy enough and fun. =) Thanks for sharing!
ReplyDeleteI love that this story can be used for so many different activities. I'm going to have to try it as a draw and tell now.
ReplyDeleteThanks, Trista and Sarah. I should probably mention that I haven't tried this one with the kids yet as we're on a storytime break, but I don't see why it wouldn't work. You can make the pauses while you're drawing seem really suspenseful and dramatic.
ReplyDeleteSince I prefer to draw on a computer, I'm actually thinking it might be fun to try this on a laptop with a projector.
This is great. It would be lots of fun to have a class of older kids visit the library and tell small groups of storytime families each different version of the same story.
ReplyDeleteThis is the perfect beginner Draw and Tell story for me. Thank you! And BTW, can we add...Go Away Big Bad Winter...I know my story time parents would welcome that chant! ~ jane
ReplyDeleteI love this - I'm going to do it with 2nd graders in my tech class,and they'll use Google Draw to create it. Thanks for the idea!
ReplyDelete